Introduction
The Expian Admin Portal is your main platform for users and global settings, creating and publishing services and products for sale. This documentation provides a comprehensive guide for navigating and utilising the features of the portal effectively.
The Expian Admin Portal is the central hub for configuring and managing all services, products, and operational settings within the Expian platform.
It enables teams to create, publish, and maintain live experiences, from admissions and journeys to promotions and entitlements, ensuring consistency across all sales channels and integrations.
Using the Admin Portal effectively helps maintain data integrity, streamline workflows, and keep customer-facing experiences aligned with operational and business objectives.
By defining your core building blocks, pricing structures, and permissions here, you establish a single source of truth that supports accurate reporting, secure operations, and a consistent customer journey across both Attractions and Travel sectors.
Accessing the Admin Portal
Log in to the Expian Admin Portal using your assigned credentials.
Access permissions and visible modules depend on your User Role and configured rights in User Administration.
Administrators can add or restrict access for specific users to maintain security and ensure operational accountability.
If you are unable to see a particular section, confirm your role with a system administrator.
Navigation Overview
The Admin Portal’s left-hand navigation menu provides access to all major configuration areas.
Modules are organised logically to follow the complete setup workflow, from foundational configuration (Building Blocks) through product creation and pricing, to management and reporting.
Primary Modules include:
- Building Blocks: foundational setup for Locations, Venues, Capacity, and Ticket Types
- Services: create and manage timetables, time slots, and service rules
- Products: define sellable items including Admissions, Events, and Journeys
- Entitlements: manage memberships, vouchers, and patronages
- Combos: link multiple products into combined offers
- Promos: configure discounts, promo codes, and group offers
- Extras: manage ancillary items and recommendations
- Trade Partners: create and control trade partner accounts and pricing
- User Administration: manage system users, roles, and permissions
- Pricing Overview: bulk price review and updates
- System Settings: manage global configuration, integrations, and defaults
Tip:It's not always the case that you should work though each module in top to bottom sequence, so refer to documents or ask NoteBookLM for the order in which set up be carried out.
Accessing the Portal
- Login to the Expian Admin Portal URL.
- Enter your credentials.
The following is your landing page, 'Building Blocks'. The black banner denotes features of the Admin Portal and each one will be described in this document.
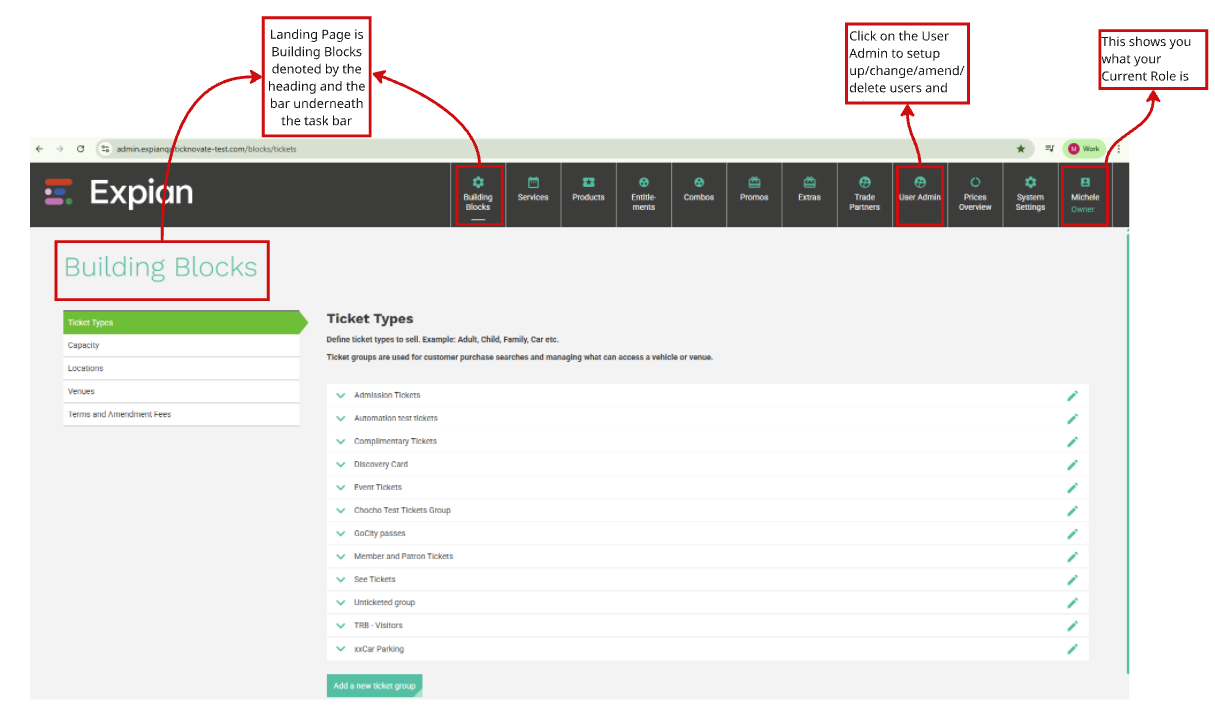
- Main Menu to access different sections of the portal: Building Blocks, Services, Products, Entitlements, Combos, Promos, Extras, Trade Partners, User Admin, Reports, Prices Overview, System Settings.
- Integrations appear in multiple places. It's for connecting to systems like Google Analytics or Financial Systems.
- Use the pencil icon to edit a record.
- Save Button will appear when you have created enough information for the record to be created.

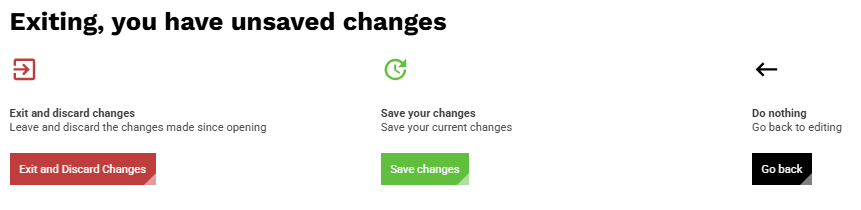
- Back button will return you to the previous screen, and you will lose any changes that you made.

System Messages and Banners
Throughout the Admin Portal, banners and pop-up messages provide live feedback on user actions.
They are colour-coded to make the system’s response easy to interpret:
- Green banner: confirms a successful action (e.g., record saved or published).

- Red banner: indicates a validation error or missing required field.

- Yellow banner: provides an informational or warning message.
- In use banner: alerts you that the record is currently in use and changes may affect live products or bookings.
These real-time messages help users identify errors early and ensure that changes are completed safely before publication.
Banners can be removed from your screen by clicking on the X in the banner at the far right.
You may receive red banners, which states that a record could not be saved and why.
Another message you may encounter is the 'In use' banner, which appears when attempting to edit a record currently active in the system. The example below shows the warning displayed when editing a Capacity Plan that is already in use. The message explains that changes may affect existing bookings, and you should review the sales report and contact any impacted customers before proceeding.

Version Control and Publishing
Every module within the Admin Portal supports version control.
When edits are made to live configurations, you must Save or Publish to confirm and apply the changes.
- Save: retains your work-in-progress but does not make it live.
- Publish: applies updates to all connected systems and sales channels.
- Unpublish: temporarily removes a configuration from active use without deleting it.
Publishing changes ensures that all front-end systems (such as POS, Web, and API) are synchronised with your latest updates.
Best Practices
- Please share your user role with the Expian team when creating support tickets or any other comms with Expian, so they can assist you more easily. It can be found on the far right of the of the black banner menu, where you name will appear and display your User Role and the option to log out.
- Always confirm your User Role before starting, access and visibility depend on permissions.
- With the exception of System Settings and User Admin, It is recommended to approach the Admin Portal features on the Admin task bar from left to right, meaning Building Blocks though to Pricing Overview.
- Publishing should only be carried out when the Attraction / Event / Route / Journey has been completed, though you can Unpublish as well.
- Complete all required fields before saving to avoid validation errors.
- Use clear, consistent naming conventions for Locations, Venues, and Products to simplify reporting.
- Save frequently as unsaved changes are not retained when navigating away.
- Unpublish products or services when they are under revision to prevent live inconsistencies.
- Regularly review user permissions, integrations, and linked records to maintain data accuracy and security.
- Use meaningful External IDs that align with your integration or finance system references.
Summary
The Admin Portal brings together every operational component of the Expian platform into one unified interface.
It enables teams to configure products, pricing, and user permissions confidently, ensuring that each customer-facing experience runs smoothly and consistently.
When managed effectively, it reduces duplication, improves collaboration between departments, and ensures data accuracy across all connected systems, the foundation of a secure, scalable, and efficient Expian environment.
Was this article helpful?
That’s Great!
Thank you for your feedback
Sorry! We couldn't be helpful
Thank you for your feedback
Feedback sent
We appreciate your effort and will try to fix the article